What could be considered the most basic skill in Sims 2 modding is successfully creating independent object clones. Object clones are stand-alone objects which do not override any game resources. Depending on the needs of the creator, they may reference game assets (textures, models) to save .package size.
A .package containing resources can be thought of as an archive containing files.
Creating an independent object can be summarised to three key steps.
- Cloning the object.
- Changing the object’s GUID, group number, and resource names.
Cloning the object
Step 1: Start Simpe.
Step 2: Navigate to the Object Workshop tab and hit ‘Start’ to activate it. Wait for it to load fully (this may take a while).
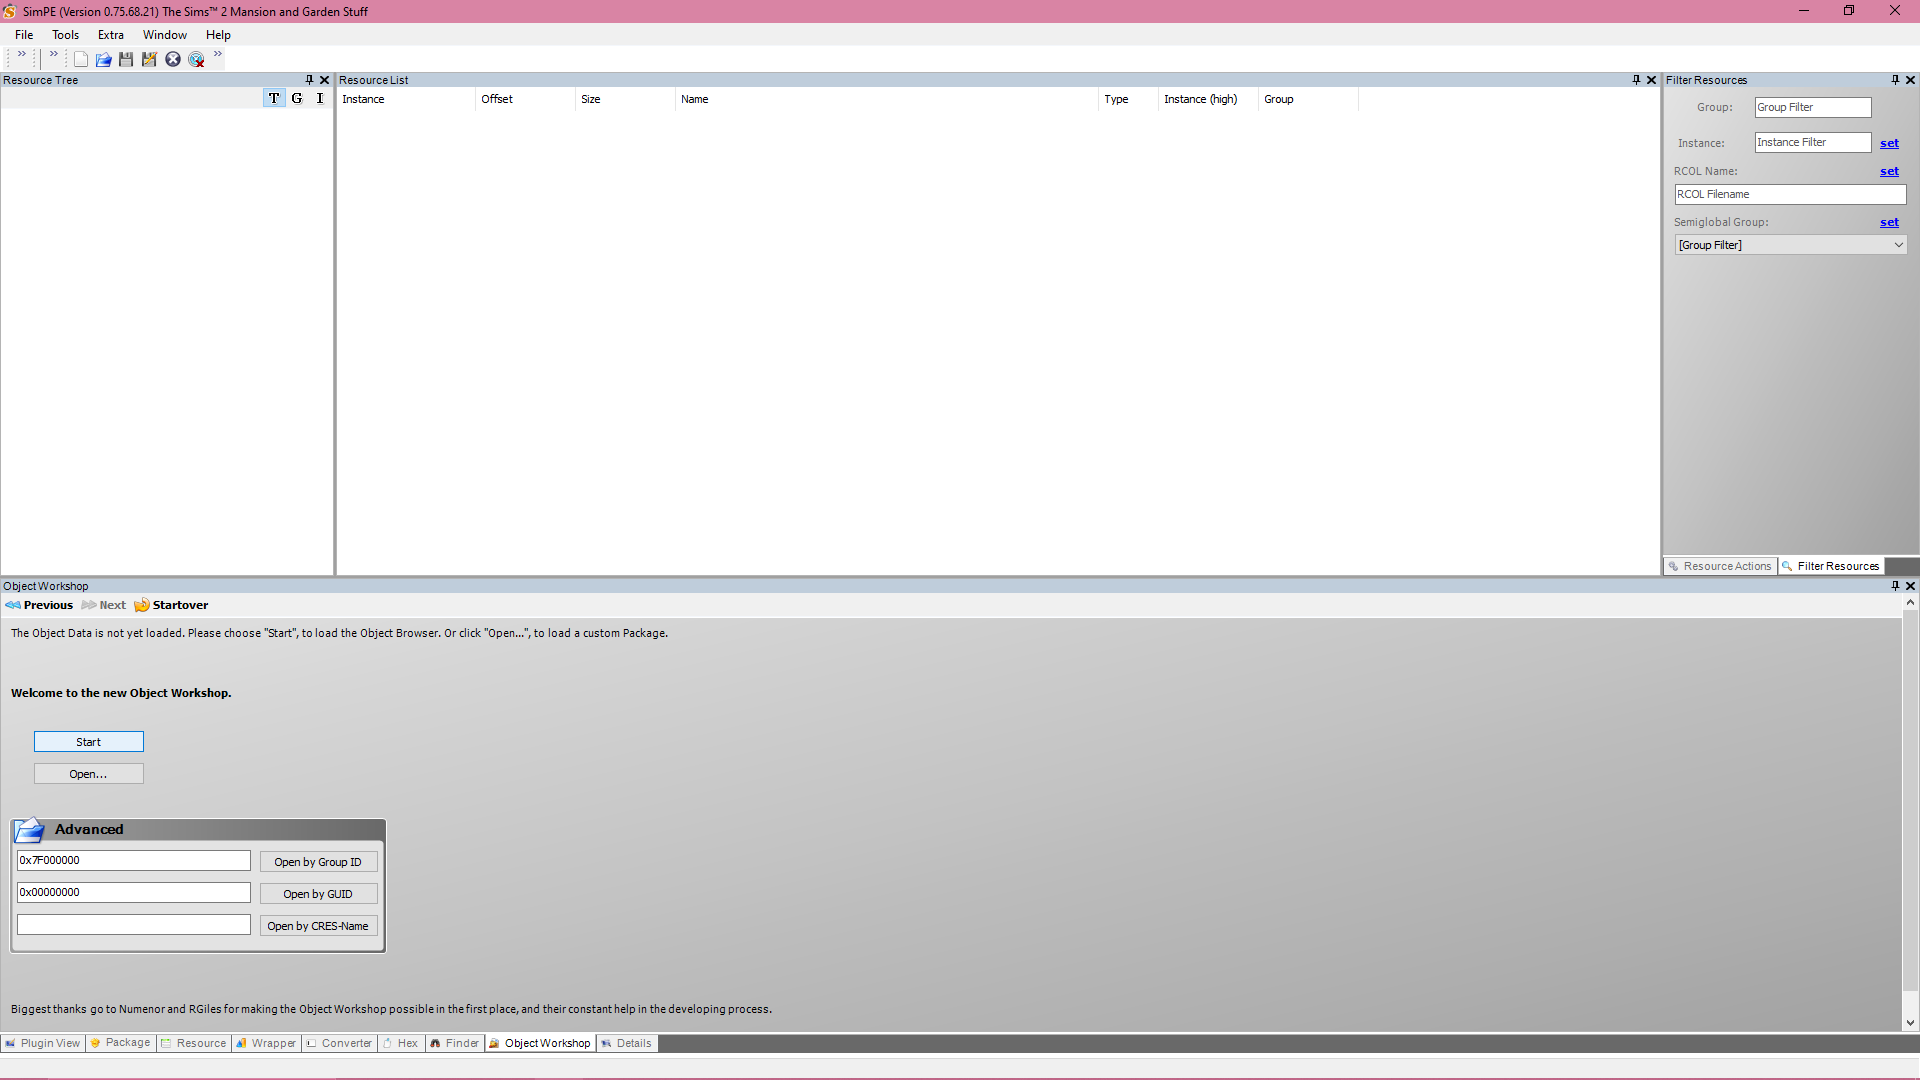
Step 3: Once the objects have loaded, the interface should resemble a simplified catalog. Select the object you wish to clone. It is best to choose an item that is similar in function to what you plan to create. For this example, I’m using the flamingo sculpture.
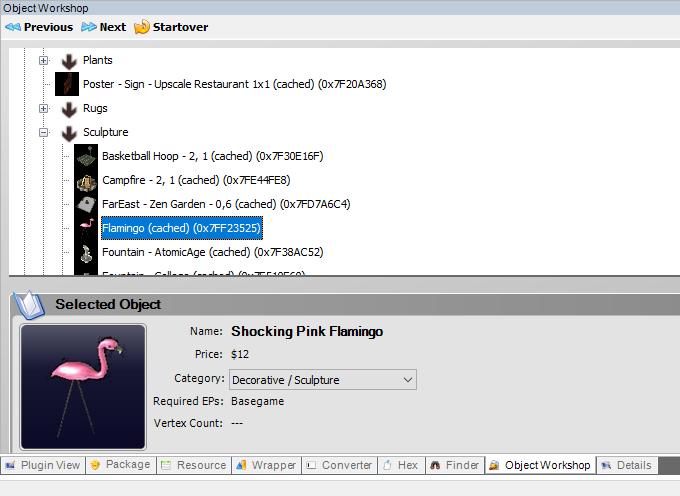
Step 4: You will be prompted to select a few checkboxes which affect the cloning process. As you continue on your hacking journey, you may need to check/uncheck these at your own discretion depending on your needs. Presented below are the settings I tend to use, which differ slightly from the default settings
(you may revert default settings by hitting the Set Defaults option.) Helpful tooltips explain what each checkbox does when hovered over.
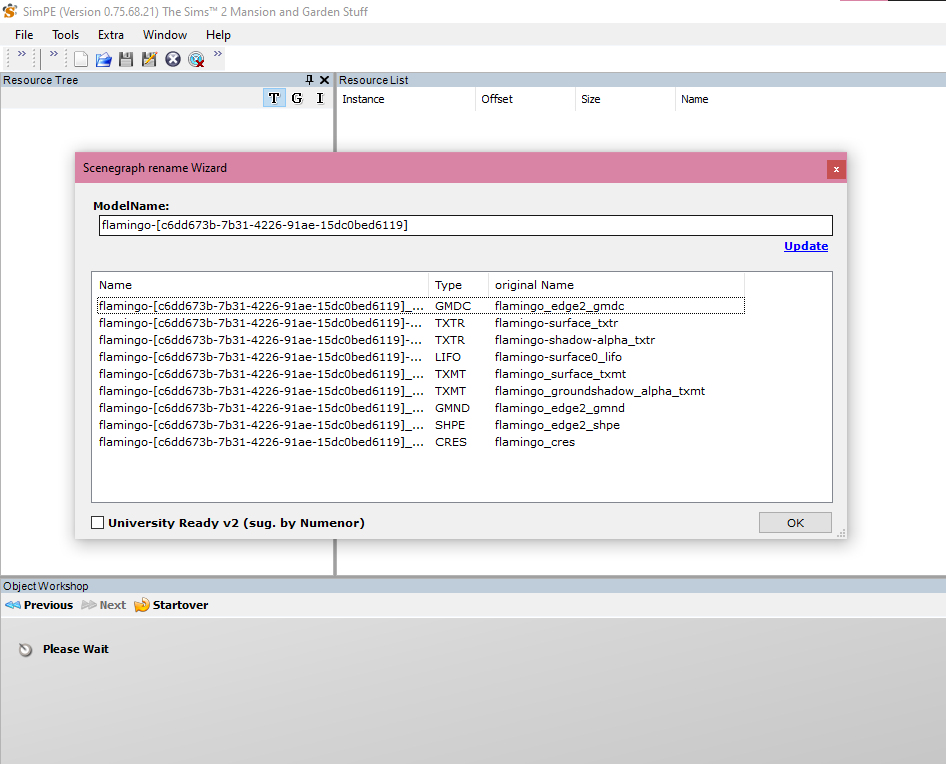
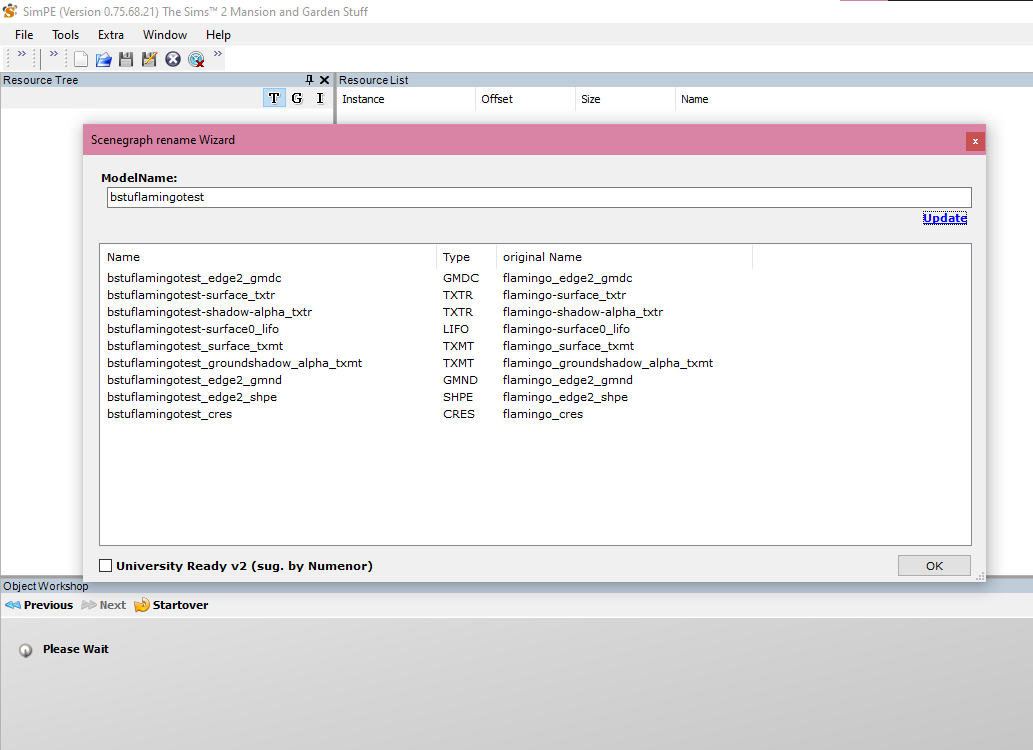
Step 5: If you’ve selected [ ] a pop-up will appear prompting you to rename the Scenegraph resources. This is necessary so that the 3D resources for the object (meshes textures, etc.) do not override game resources. Luckily, SimPE automatically appends a random hashed value to these resources, so all you need to do is hit ‘Update’ and then ‘OK’. Personally, I don’t use the generated prefix – I prefer legibility and have my own theory that longer resource names may hurt performance – you may choose to use your own prefix but ensure that it is something unique that is unlikely to clash with other CC. Using your creator name is a good bet.
Step 6: If you’ve followed everything correctly, you should now get a prompt asking you where you would like to save your .package. You may choose to save it directly to your Downloads folder under a specific subfolder. I would use something like, Downloads/My Stuff/Flamingo and save it as bstuflamingo.package. You now have a functional, semi-independent .package file!
Making the object fully independent
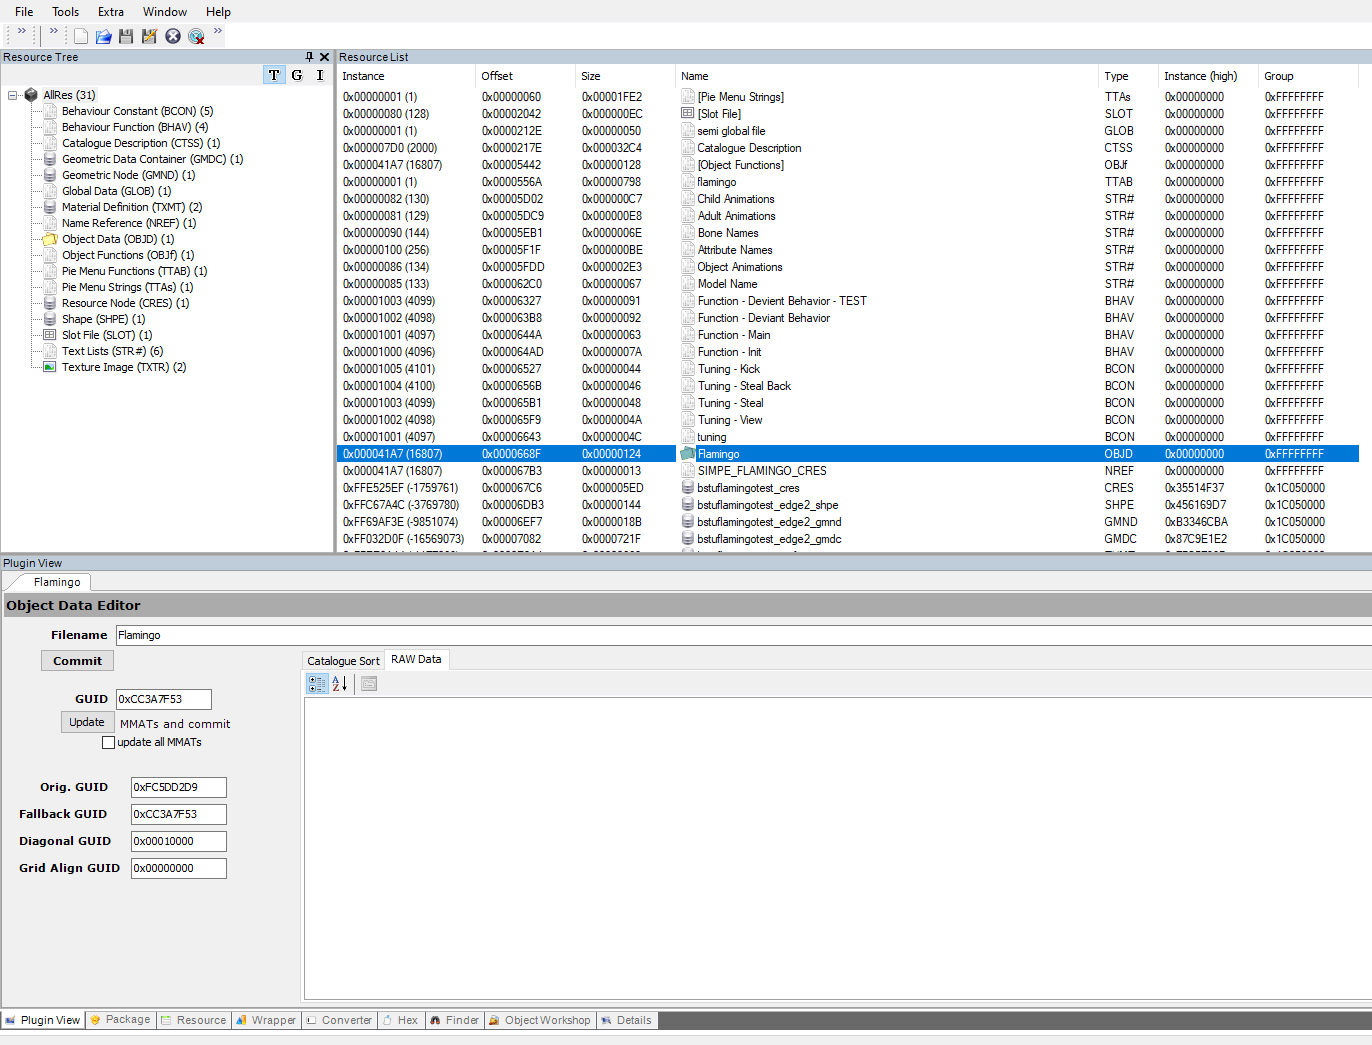
The astute will recall that that I previously mentioned changing the object’s GUID, group number, and resource names. Fortunately, we have aleady modified the resource names in Step 5. Additionally, if you’ve performed Step 4 as shown above, your group number should be 0xFFFFFFFF, which means the .package has already been made Private or self-contained. This means that all that is left is changing the GUID. Every OBJD file has its own GUID, and it is the OBJD that allows an object to appear as a Simantics object (in the catalogue or otherwise) in-game. Currently, our cloned .package is using the Flamingo’s GUID, which isn’t what we want.
Step 7: Changing the object’s GUID
Step 7.5: Changing the GUIDs of a multi-tile object
Step 7.6: GUID-dependant BHAVs
Leave a Reply